12.15.2012

Laura Mercier Concealer - Review

I'm procrastinating on my wedding planning, so what better than to write about something that's kind of relevant to weddings, but not really? Here's my review for the Laura Mercier concealer!


I’m not a huge make-up person, but I’ve always used a powder foundation. I was going to a Christmas party last week and decided I needed more coverage. I went to Sephora, and the person I spoke to happen to represent Laura Mercier. She demoed the Secret Camouflage on me, and I absolutely loved it. The compact comes with two colours for you to blend, it’s oil free, and it can even cover up tattoos!
You simply blend the colours with the brush, and paint it on. Super easy. Next, just set it with the Camouflage Powder, and you’re good to go.
The best part of this is that there’s a starter kit with all the things you need, and then some! I love kits! Even better, it comes with the brushes you need!
What's your must have make up?

11.19.2012

Twine Flowers - Wedding Decor!

I made a list of DIY project that I want to do for our wedding. One of these things were twine flowers that I had found on Pinterest (Follow Me!). They were cute, rustic, and looked relatively simple to make. There was one thing that held me back was that you needed to make your own loom, and after each flower, you had to disassemble the loom and then reassemble it for the next flower.

I felt that this assembly and disassembly was extremely inefficient, so I set out to look for a loom that was meant to make these flowers. It wasn't that difficult to find one. I went to Michaels, and they had a couple versions. I settled on the loom from The Crochet Dude. It cost about $4.00 and I had a 50% off coupon. I bought a couple bundles of embroidery thread in our wedding colours, and off I went.


The loom has 2 notches at the bottom. First, start with a tail of about 15", and then put the thread into the notch. You then start by looping the thread around the peg directly opposite the notch. I like to do it in a figure 8.


Next, you figure 8 the thread around the peg directly opposite the first peg. You can now either loop the thread around the first peg again, or you can move left, and continue until all the pegs are looped. I prefer looping each peg twice before moving on. Depending on how full you want the flower to look, you can go around either 2 or 3 times. To conserve thread, I think 2 loops look pretty good.


Once all the pegs are looped to your liking, you can put that end into the second notch, and then cut the thread with about 2 inches left. This is only so you can hold that end taut while you are backstitching the middle of the flower.

I like to spin the loom around so that the notches are at the top. Thread the 15" end through the needle, and count back 2 petals, go down, and come back up 3 petals later. So back 2, forward 3.

 Continue back stitching until all the petals have been stitched. I like to go around the center twice, or until I have about 2 inches of thread left.
Once the center has been stitched, you can finish it off by weaving the end in and out of the petals to secure, or you can tie the 2 ends together.

Here is the finished flower:
To make a double flower, you simply create the second flower on top of the first, and stitch them both together at the same time. The same concept of 2 back, 3 forward applies when you're backstitching. you would only need one tail end to stitch the flowers together. You can choose to use the end from either flower. Just make sure you leave enough thread to stitch it all together.

Once I got the hang of it, it took me about 10  minutes per flower. It's a great project to do when you're watching TV, when you don't really have to focus on what you're doing. for a small flower like the one I've shown, about 2" in diameter, it used about 2 meters of thread when going around 2 times.

Let me know what you think!

xoxo
Meesh

11.06.2012

Invitations Decisions!!


Those close to me know I have major issues when it comes to decision making. I blame it on being a Libra. So the latest dilemma is how to do our invitations. I've been perusing Pinterest (FOLLOW ME!) for months now, and the more I look, the less I seem to be able to decide.

I originally wanted something formal, with a pocket, and staggered inserts (see original post here). But as the details of our wedding are being finalized, well, as finalized as someone with decision making issues can be, my vision for our invitations have evolved. I don't want something super formal, since our wedding will not be super formal. I've been deciding between fun vs. classic. Here are some of the concepts I've toyed with:

FUN:
nickeldesign on Etsy

100 Layer Cake - Cheerful Maine Wedding: Ruth + Ed
Lauren by The Pulp Studio
Classic:
Pinkpolka Wedding Invitation
Hydrangea Invitation by redpearldesigns on Etsy
It was and is difficult deciding what we're going to do. My MOH was so sick of hearing me flip flop between all the various options that she just flipped a coin and decided for me. I was happy with the decision, but in the end, I went back to basics. I thought about what my original inspiration for the wedding was. What inspired me to choose green as my supplementary colour?

This picture was what started it all. 
Chic & Modern Wedding in Calgary - Wedding Obsession
I decided to look for examples with baby's breath as the inspiration. After looking through maaaany maaaany images, I decided to do something similar to this invitation.


A Down Home BBQ Wedding - Ruffled Blog
In addition to baby's breath, my bridesmaid Jocelyn suggested we add some lavender to the graphic since we will be giving honey infused with our home-grown lavender as wedding favors. And of course, purple is one of our colours.

We will print the invitation on vellum, and back it on a piece of linen textured purple card. There will be one piece for the actual invitation, and one for the map. We are going to use our app as our  RSVP tool, so it's still up in the air as to whether we will have a RSVP card directing guests to our app.

That's my decision for this week anyway. I may change my mind in a few weeks, and rethink all of this. LOL

xoxo
~meesh

11.03.2012

September Travels!

It's been a while since I last updated the blog. I haven't been thinking about planning the wedding as much since we booked the venues, and other major vendors like photographer, hair & make-up artist, and the florist. It's kind of hard too because the wedding is still 10 months away. It seems kind of ridiculous when I'm asking vendors to finalize details.

Anyway, Chris and I went on a 2 week vacation to Malaysia and Hong Kong in September. It was great! It was Chris' first time in Asia, and it was also an opportunity for him to meet my extended family. We are also planning to have a small reception in Hong Kong next year, so it was a chance for us to scope out potential venues.

Here are some pics from our trip!!


We're going up to Penticton next weekend to decide on our wedding cake. I'm still not sure if I want a traditional cake, or if I want to do a top tier, with cupcakes. Decisions!

7.22.2012

Engagement Party!

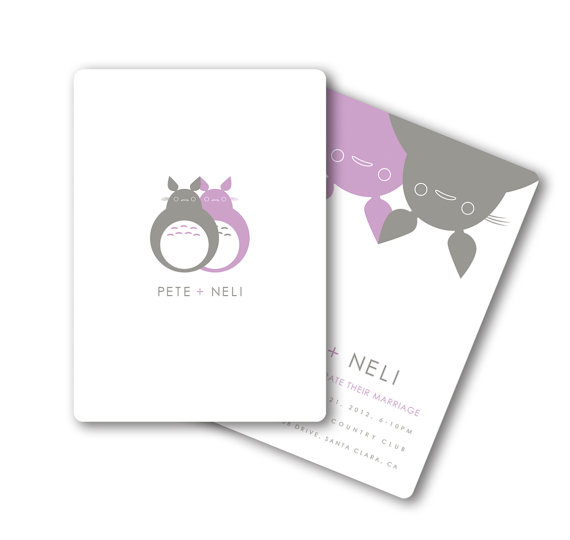
We had our engagement party about a month ago. We kept it small, only close friends and immediate family. We wanted to keep the cost low, so I opted to make the invites myself. My inspiration is from Pinterest/Etsy. Here is the finished product:

I created the text on Photoshop, and had them printed at Kinko's. The total cost for printing 30 invites was about $9.00. The envelopes actually cost me more at $15.00!! If you plan on making your own invites, definitely invest in a corner punch. I think the rounded corners definitely make them look more professional.

We had our engagement party in our backyard to keep the cost down, and to keep it low key. We bought paper lanterns from China's version of eBay, TaoBao. The total for 30 lanterns, came to about $5.00CDN. They're the same colour as our colours for the wedding, green and purple.

Here is a picture of the lanterns strung up. We had them strung up around 3 sides of our backyard.


We bought most of our food from Costco. Here is our charcuterie plate. We also had some cheese, various salads, steak and chicken wings.
Our most expensive item, was definitely our cake. It was well worth it!! It was delicious!! Chris and I have a thing with poo talk, I know, it's weird. The topper was made of fondant, and the cake was chocolate with hazelnut filling.

Here are the lanterns at the end of the night. We're definitely going to reuse these for our reception.
It was a great party. Our families got to know each other better, and we our friends got to know each other better too. It was simple, and most importantly, we all had fun!

I want to thank everyone who helped with the party. Particularly my mom, Vanessa, my maid of honour, and Jon. They made sure the party went smoothly and I was stress free! 

xoxo
~meesh